DIY Fork Bike Light Mount
Editor's note: This article was originally published in September 2014 and has been updated in August 2022 for accuracy and comprehensiveness.
I have been looking more into adventure travel by bike. This might be an all-day ride, a light tour, an S24O, or even a full-on bikepacking trip. If heading out on the road, I figured that I needed to add some lights to my bikes. This is for safety and it happens to be the law where I live.
The Commonwealth of Virginia code states that cyclists must have a white front light and a rear blinking red light if they ride on a public road between sunset and sunrise with a posted speed of 35mph or higher. Go here for more bike laws in Virginia. With increased traffic and distracted drivers, it just makes good sense to ride with lights any time of the day when on the road riding.
When I ride, I like to move my hands around the handlebar. I feel that I cannot do that with a handlebar full of stuff. I also want a light mount that looks like it is part of the light system and not something I cobbled together.
With more time wasted on the internet than I like to admit. I found all types of setups, but nothing suited my taste until I found the Problem Solvers website. They had an excellent little Blog section that showed you how to well "solve" stuff.
Now, there were a couple of ways that I could have gone about this project. I could have used a Gino Light Mount by Paul Components. Problem Solvers have two different solutions. Those would be the Brake Stud Light Mounts and Quick-Release Nut Light Mounts.
Because I have different bikes, I need to be able to move my light from bike to bike. The Gino Mount would have worked on the MB-1 but not my Waltworks CX bike. I am not sure if the Brake Stud Mount would have worked on the Waltworks because I have Paul Neo-Retro Brakes. I am not so sure about using a QR Nut Mount as part of my QR.
What I did was find two DIY hacks on the Problem Solver Blog. The first hack was a fork crown light mount and the second hack was a fork light mount. Both hacks used the QR Nut Light Mount. Both of these solutions I like. Both meet my requirement of looking like it is part of the light system.
So now I have two bikes that I want to mount lights on. Only the Bridgestone will work with the crown mount hack. But both the Bridgestone and the Waltworks will work with a fork mount set-up. Since both bikes can use the same setup. I only need to make one mount that can be moved from bike to bike. So now I have two requirements. One that the mount looks like it's part of the light system. Second, the mount can be moved from bike to bike. The fork mount hack meets those requirements.
If you decide to make this same mount. There are two things I would like to caution you on. First is the cost of this build. This project cost $36 in total to build.
Supply List:
- Cateye FlexTight Bracket #533-8827N
- Problem Solver QR Light Mount
- M5 bolt
- M5 nut
- M5 tap
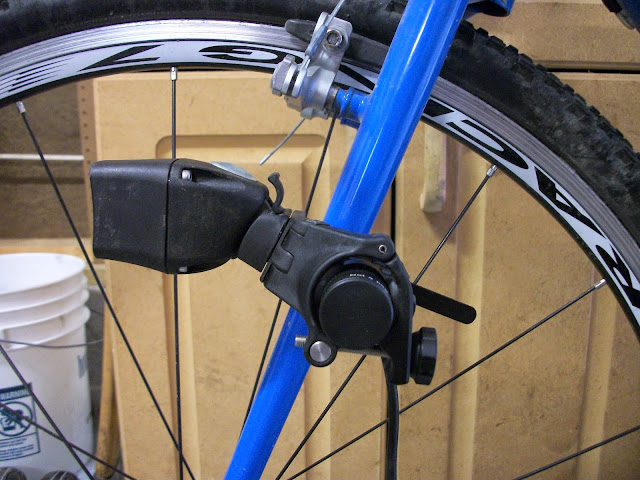
Pictured below is what the final project turned out to look like.
Side view of the DIY fork mount. |
Rearview of the DIY fork mount. |
Close-up view of the QR light mount. |
Front view of the QR light mount. |
I just used a light on hand to demonstrate what the final project would look like. I am looking at using a Princeton Tec PUSH on this mount. I will also see how well a GoPro will work on this mount.
I am happy with the way this project turned out. If you are looking for a bike mount solution. Whatever you do, make sure it is the right solution for you and that you have the skills and tools needed to do the job right.
Now It's Your Turn-
Leave a comment on how you have mounted lights in alternate locations. What are some DIY hacks that you have done on your bike?
Navigate over to our related post at:
Comments